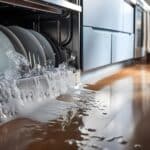
Before diving into Whirlpool specifics, work through our Dishwasher Not Draining guide, it walks through every possible cause in the right order. Everything from here on, the reset steps, part locations, and error codes, applies to Whirlpool models. Already checked the filter and hose and still seeing standing water? Move on to the no-blockage follow-up guide, which focuses on the pump.
Whirlpool reset procedure
Cancel the current cycle by pressing Cancel or Start/Resume, then hold it for 3 seconds. If the display doesn’t clear or the dishwasher won’t respond at all, cut power at the breaker for 1 minute, this resets the control board on nearly every Whirlpool model built since the mid-2000s. A soft reset clears stuck cycle states more often than people expect, so it’s worth doing before you open anything.
Filter and Pump Locations on a Whirlpool Dishwasher
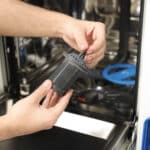
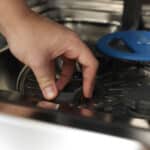
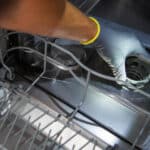
Open the door and pull out the lower rack. The filter assembly sits in the bottom center of the tub, a cylindrical piece with a handle. Turn it counterclockwise about a quarter turn and lift it straight out. There’s usually a coarser mesh screen underneath it that also needs a rinse. The drain pump itself is mounted behind the kickplate at the very front-bottom of the unit, held by two screws; reaching it means pulling the dishwasher partway out from under the counter, which is a bigger job than the filter check and usually not necessary.
Error codes you might see
F4 means water is staying in the tub after the drain cycle finishes, which is Whirlpool’s direct drain-fault code and almost always traces back to the filter or hose rather than the pump motor. F3 is a heating fault and F2 is a leak detection at the base pan, neither one related to drainage, so don’t let a code on the display send you chasing the wrong part.
Common Whirlpool Sticking Points
Because there’s no disposal-style grinder, the filter clogs faster than on brands that macerate food waste, especially in hard-water areas where mineral buildup combines with grease to form a solid ring around the mesh. People who’ve owned a self-cleaning-filter dishwasher before tend to skip this step entirely and assume a broken pump when the fix is a two-minute rinse under the tap. Plan on checking it monthly if you don’t pre-rinse dishes.
Frequently Asked Questions
Do all Whirlpool dishwashers have a removable filter?
Yes, every current Whirlpool dishwasher uses a manual filter rather than a grinder, so it needs periodic cleaning regardless of the model.
Is F4 always the drain pump?
No. It just means water didn't clear the tub in time. Check the filter and drain hose first since they cause most F4 faults, not the pump itself.
How often should I clean the filter?
Roughly once a month with normal use, more often if you don't pre-rinse dishes or you have hard water.
Can I run another cycle to try to clear standing water?
No, that adds more water on top of the clog and risks tripping the float switch. Clear the blockage first.
None of this replaces a hands-on look from a qualified appliance technician, it’s meant as a diagnostic starting point.
]]>